Animation in Google Slides
Students can animate in Google Slides for a fun introduction or final project for a unit. The animation is a very simple way for students to show understanding of a particular concept.
To animate in Slides, you will first need to create a presentation. Then:
To have your slideshow run automatically:
After you have published, you will get a link to share the animation. Upon opening this link, the slideshow/animation will start automatically. This link isn't searchable, but is much like a PDF in that it can be viewed by anyone.

Some ways you could have students use animation in Google Slides:
Here are a few examples from my ETC:
To animate in Slides, you will first need to create a presentation. Then:
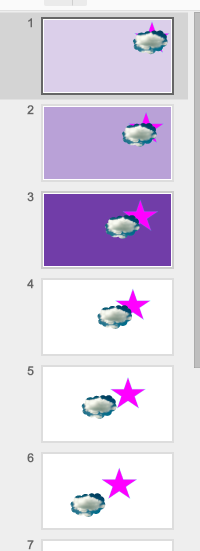
- Insert a shape/image/object onto the first slide
- Duplicate slide 1 by right-clicking on it
- On the slide 2, move the shape/image/object slightly so that if you were to toggle between slides 1 and 2, you would see movement
- Duplicate slide 2 and again slightly rearrange the shape/image/object on slide 3
- Continue doing this until you've completed your steps or animation
To have your slideshow run automatically:
- In the Slides menu choose File- Publish to the web
- Change "Auto-advance slides" to "every second"
- Select "Start slideshow as soon as the player loads"
- Publish


After you have published, you will get a link to share the animation. Upon opening this link, the slideshow/animation will start automatically. This link isn't searchable, but is much like a PDF in that it can be viewed by anyone.

Some ways you could have students use animation in Google Slides:
- Step-by-step directions on how to solve a math problem
- Plot lines for a story/novel
- Procedures for a science experiment
Here are a few examples from my ETC:


Comments
Post a Comment